Manual Hybridization Technique: Emasculation (Removal of Male Flower Parts) and Pollen Application for Producing F1 Hybrid Seeds
In the high-tech crop seed production industry, F1 hybrid seeds are always the "golden key" helping farmers achieve outstanding yields, excellent disease resistance, and high adaptability to climate change. To create F1 seeds that fully carry the superior hybrid advantages from both father and mother, the manual hybridization technique – including two key steps: emasculation (removal of male flower parts) and pollen application (pollination) – plays a decisive role in 90% of the success rate.
This article will guide in detail the standard technical process of plant cell cultivation, helping agricultural engineers and gardeners master the technology of producing standard studio F1 seeds in high-tech agriculture.
1. What Are F1 Hybrid Seeds? Why Manual Hybridization?
F1 seeds (Filial 1) are the first hybrid generation created from cross-pollination between two purebred parent lines carrying different desired genetic traits.
Due to the natural structure of most crop groups (especially the Solanaceae family such as tomatoes, chili peppers, or the Cucurbitaceae family such as melons, cucumbers) which are self-pollinating or wind and insect pollinated, self-pollination will lose the necessary hybrid vigor. Therefore, manual hybridization technique by hand is applied to thoroughly prevent self-pollination of the mother line and ensure that pollen from the father line is accurately applied to the stigma of the mother flower.
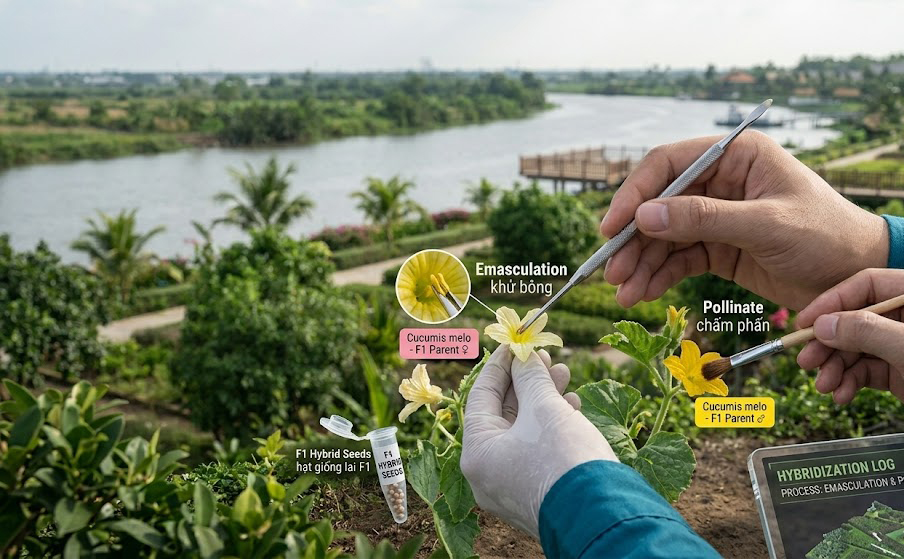
2. The 3-Step Standard Technical Emasculation (Removal of Male Flower Parts) Process
Emasculation (also called removal of male flower parts for some crops) is the operation of completely removing the anthers (male reproductive parts) on the flower of the selected mother plant before these anthers rupture and release pollen.
Step 1: Select suitable mother flowers
Timing for selection: Choose flower buds of the mother plant that are about to bloom the next day (buds that are large in size, petals have changed from green to pale yellow or slightly open but the inner anthers are still closed).
Flower position: Should select flowers in healthy positions, first or second branch level with stable sap flow to ensure nutrition for the hybrid fruit later.
Step 2: Emasculation operation using specialized tools
Use a sharp stainless steel clamp (medical tweezers) sterilized with 70-degree alcohol.
Gently slide the tip of the clamp to slightly separate the unopened petals, clamp tightly the base of the anthers of the mother flower bud and pull outward decisively.
Core note: Absolutely do not damage the stigma and ovary of the mother flower at the flower center. Also, do not leave any anther, even the smallest one.
Step 3: Isolation to protect the mother flower
Immediately after successful emasculation, wrap the mother flower with a specialized isolation bag (waterproof paper bag or ultra-fine non-woven fabric bag).
This helps absolutely prevent insects carrying foreign pollen or wind pollination unintentionally.
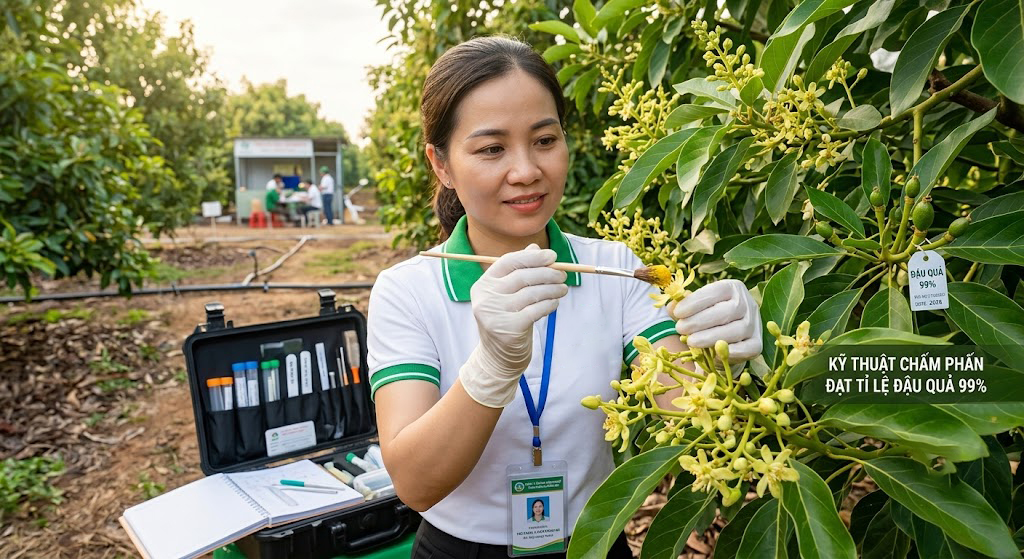
3. Pollen Application (Pollination) Technique Achieving 99% Fruit Set Rate
After the mother plant has been safely emasculated, the next step is to collect pollen from the high-quality father line to apply pollen to the mother plant.
Step 1: Collect pollen from the father line
Pollen collection time: Conduct in the early morning (about 7:00 - 9:00 AM) when the weather is dry and warm. This is when the anthers on the father line rupture and the pollen is most viable.
Harvest method: Pick freshly opened male flowers of the father line, use cotton swabs, soft brushes, or directly use tweezers to separate anthers and pour into petri dishes/small glass jars to collect pollen.
Step 2: Proceed with pollen application (manual pollination)
Open the isolation bag of the mother flower that was emasculated the day before.
Use a cotton swab or directly use male flowers of the father line to gently but evenly apply pollen onto the stigma tip of the mother flower. The stigma tip usually has natural mucus that helps hold the pollen firmly.
Golden pollination time: Best from 8:00 to 10:30 AM. Avoid pollination at noon under strong sun or on rainy, humid days because high temperature and rainwater will kill the pollen.
Step 3: Bag the flower and attach tracking tags
After pollen application, immediately re-wrap the isolation bag for the mother flower to protect the newly pollinated ovary.
Hang a durable plastic/paper tag clearly stating: Hybrid combination name (Mother x Father) and Pollination date for easy tracking of growth process and accurate harvest timing.
4. Important Notes for F1 Hybrid Seeds to Achieve "Studio" Quality
To ensure the F1 seed production process achieves maximum germination rate and 100% purity, engineers must strictly adhere to the following principles:
-
Strict tool sanitation: Always sterilize hands and sharp tweezers with alcohol before switching to operations on another mother plant to avoid unwanted cross-contamination.
-
Continuous removal of off-types: Regularly check and remove off-type plants, diseased plants on both father and mother rows before starting the pollination season.
-
Manage the number of hybrid fruits on the plant: After successful pollination for 3 - 5 days, thin out substandard fruits, keeping only 2 - 3 healthiest hybrid fruits on one mother plant to concentrate nutrition for the best seed development.
Manual hybridization technique by emasculation and pollen application requires meticulousness, patience, and high accuracy, but it is the optimal method to control the genetic quality of F1 hybrid seeds. Applying the correct cultivation technical process not only optimizes production costs but also creates commercial seed lines meeting international standards, bringing sustainable economic value to crop seed enterprises.